
Here is the tutorial ;
Use the Clone Stamp Tool in Photoshop CS5
The Clone Stamp tool is used for pixel-to-pixel cloning in Adobe Photoshop Creative Suite 5. The Clone Stamp tool is different from the Healing Brush tool in that it does no automatic blending into the target area. You can use the Clone Stamp tool for removing a product name from an image, replacing a telephone wire that’s crossing in front of a building, or duplicating an item.
Here’s how to use the Clone Stamp tool:
- With the Clone Stamp tool selected, position the cursor over the area you want to clone and then Alt-click (Windows) or Option-click (Mac) to define the clone source.
- Position the cursor over the area where you want to paint the cloned pixels and then start painting.Note the cross hair at the original sampled area. While you’re painting, the cross hair follows the pixels you’re cloning.
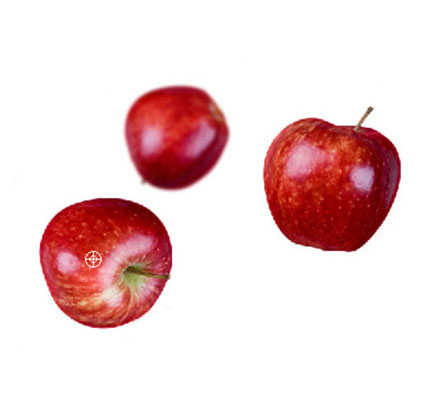 A cross hair over the source shows what you’re cloning.
When using the Clone Stamp tool for touching up images, you should resample many times so as to not leave a seam where you replaced pixels. A good clone stamper Alt-clicks (Windows) or Option-clicks (Mac) and paints many times over until the retouching is complete.
Choose Window→Clone Source to open the Clone Source panel. With this handy little panel, you can save multiple clone sources to refer to while working. Even better, you can scale, preview, and rotate your clone source — before you start cloning.
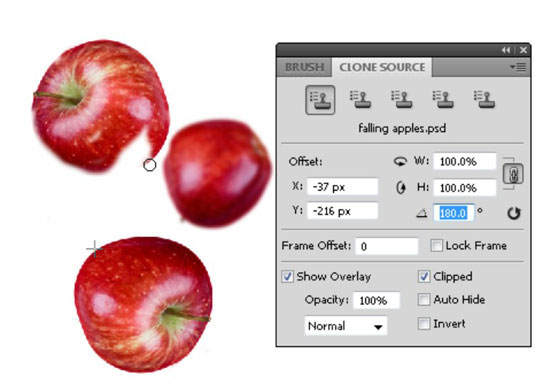
Additional options in the Clone Source panel. In this example the apple rotates 180 degrees while being cloned.
The Clone Source panel can be extremely helpful with difficult retouching projects that involve a little more precision.
Follow these steps to experiment with this fun and interactive panel:
- If the Clone Source panel isn’t visible, choose Window→Clone Source.The Clone Source icons across the top have yet to be defined. The firststamp is selected as a default.
- Alt-click (Windows) or Option-click (Mac) in the image area to record the first clone source.
- Click the second Clone Source icon at the top of the Clone Source panel.
- Alt-click (Windows) or Option-click (Mac) somewhere else on the page to define a second clone source.Repeat as needed to define more clone sources. You can click the Clone Source icons at any time to retrieve the clone source and start cloning.
- Enter any numbers you want in the Offset X and Y, W and H.Angle text boxes in the center section of the Clone Source panel to set up transformations before you clone.
- Select the Show Overlay check box to see a preview of your clone source.Whatever you plan to do, it’s much easier to see a preview before you start cloning. If you don’t use the Clone Source panel for anything else, use it to see a preview of your clone source before you start painting. If it helps to see the clone source better, select the Invert check box.You see an overlay (or preview) before cloning begins. This overlay helps you better align your image, which is helpful for precision work. If you want the preview to go away after you start cloning, select the Auto Hide check box.
No comments:
Post a Comment